
Sneak Peek at Electronics Projects For Dummies**
In Electronics Projects For Dummies we walk you through the building of ten cool and simple to create electronics projects. The book includes comprehensive, step by step instructions, with photos, schematics and parts lists for each project. The following kind words that were posted by a reader on Amazon sums up the book pretty well:
“Years ago (many, many years...) I was an electronics hobbyist, and I even worked at Radio Shack. Recently, I came across some of my old "toys" and wanted to see what was going on in the world of electronics projects these days. A big fan of the "Dummies" books, I saw this title and took a shot.
At first I was a little dismayed to find that there were only ten or so projects, and looking at them they all seemed pretty lame. But once I studied them I realized that these ten, fairly simple projects, were perfect examples of so many different concepts that were easily adoptable and transportable to many other uses, more like what I had in mind.
Basically with these few projects you can learn about remote control, both IR and RF, speech recorder chips, speech synthesis chips, LED sequencing, light activated controls, motion activated controls, robotic propulsion, and even basics of radios and amplifiers, all using modern, easily obtainable parts.
And in addition to great content, the writers have a great style, using an approach and language that is easily understandable to beginners but meaty enough for experts.
If you are interested in an excellent book to give you a wide introduction to many different electronic concepts, this is the book for you!”
Here’s a quick overview of each project:
Sensitive Sam, the line following and radio controlled go-kart is my favorite project in the book. Sam has sensors that help him follow a track of electrical tape you place on the floor. A radio remote control allows you to control his speed or honk the horn to tell your cat to get out of the way. The following photo shows Sensitive Sam on track.

In Surfing the Airwaves we build an AM radio using an integrated circuit that contains most of the circuitry needed to translate radio waves to sound. Here's a look inside our radio.

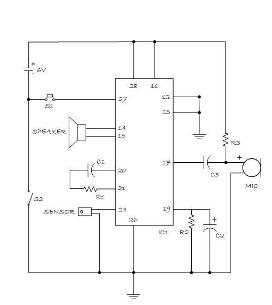
The Couch Petato project uses a tilt sensor to detect movement when your pet (or anybody else) jumps onto your couch. The sensor turns on a voice chip integrated circuit which sounds off with your recorded message telling the intruder to scram. The schematic for this project is shown below.
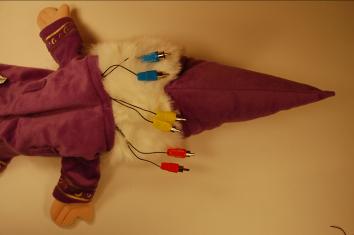
Murmuring Merlin project uses a sound synthesizer integrated circuit connected to switches hidden in a hand puppet. This project allows you to create your own messages that play when someone shakes the puppet's hand or squeezes its nose. This photo shows the result of surgery we performed to string wires to the hidden switches in the puppet's anatomy.
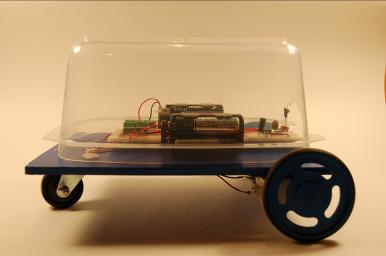
The infrared controlled Bubble Kart uses encoder and decoder integrated circuits along with an H-bridge motor controller that together let you direct the go-kart as it wheels around the room. The following photo shows the finished go-Kart.
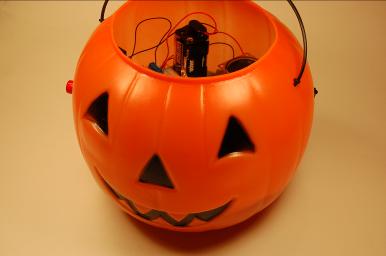
The Scary Pumpkins sense visitors when they walk between them using an infrared beam. The pumpkins then greet the vistors with a spooky message you record on a voice chip integrated circuit. Here are the electronics bits stuffed inside one of the pumpkins.
The Handy-Dandy Metal Detector keeps the number of electronic components needed to a minimum through the use of an integrated circuit called a proximity detector. The completed circuit is shown in the photo below.
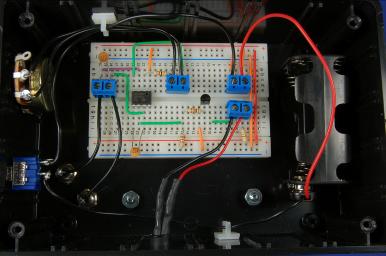
In the Dance to the Music project we use low and high pass filters to make groups of LEDs dance to the beat of music. This photo shows we wired it all together.
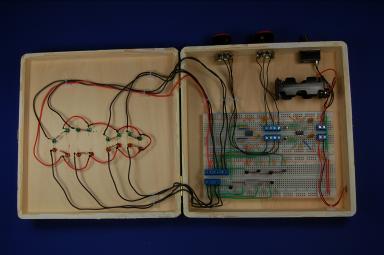
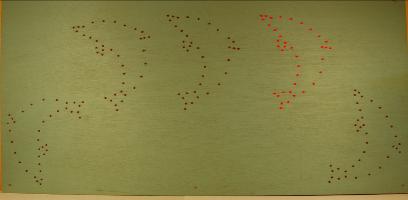
In the Dancing Dolphins project we use a timer integrated circuit and a decade counter integrated circuit to light up a dolphin display. These lights form the outline of dolphins that dance across the wall in sequence, as you can see in this photo.
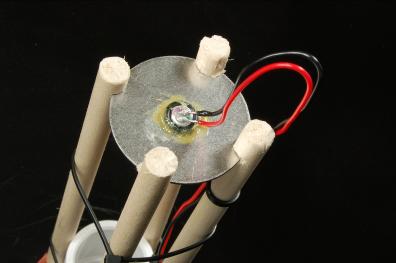
The Parabolic Microphone allows you to listen to nature at a distance by amplifying sounds. The following photo shows how we mounted the microphone in the parabolic dish.
Copyright © 2007 Hawk's Perch Technical Writing, LLC - All rights reserved